High Quality Embroidery Digitizing for Clothing Brands
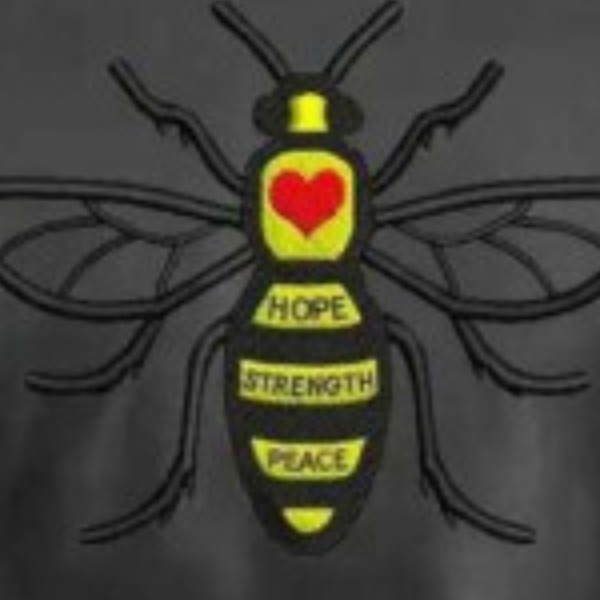

Embroidery has become an important part of clothing branding, helping businesses create distinctive apparel with logos, names, symbols, and custom artwork. However, achieving professional embroidery results starts long before the needle touches the fabric. The logo or artwork must first be converted into a properly structured embroidery file through high quality embroidery digitizing.
For clothing brands, digitizing quality can directly affect how a logo looks on finished garments. Poorly planned stitches can create uneven coverage, distorted lettering, puckering, excessive thread buildup, or unclear details. A well-digitized design, on the other hand, can produce clean and consistent embroidery across different apparel products.
Whether a brand produces T-shirts, hoodies, jackets, uniforms, caps, or workwear, understanding the fundamentals of high quality embroidery digitizing can help create better finished products.
What Is High Quality Embroidery Digitizing?
High quality embroidery digitizing is the process of converting artwork into a machine-readable embroidery file while carefully planning how every part of the design will be stitched.
A professional digitized file includes instructions for:
- Stitch types
- Stitch direction
- Stitch density
- Underlay
- Pull compensation
- Stitch sequence
- Thread changes
- Design dimensions
- Machine compatibility
The purpose is not simply to convert an image into stitches. The design must be constructed so that it can reproduce the important visual features of the artwork on fabric.
Why Is Digitizing Important for Clothing Brands?
A clothing brand often relies on its logo to create visual recognition. If the embroidered version of that logo looks inconsistent, the overall appearance of the garment can suffer.
Quality digitizing can help maintain:
- Clean logo shapes
- Readable lettering
- Consistent coverage
- Accurate proportions
- Professional edges
- Better stitch stability
For brands producing multiple garments, consistent embroidery is particularly important because customers expect the same logo to look similar across products.
Start With the Right Artwork
The quality of the original artwork can influence the digitizing process.
Whenever possible, clothing brands should provide a clean and high-resolution version of their logo.
Useful formats can include:
- AI
- EPS
- SVG
- PNG
- JPG
Vector artwork is especially helpful because it provides clear shapes and allows the digitizer to examine individual elements more accurately.
However, a professional digitizer can often work with other suitable formats when vector artwork is unavailable.
Create the Design for Its Intended Size
A clothing brand may use the same logo in several locations.
For example, a logo could appear on:
- Left chest
- Full front
- Jacket back
- Sleeve
- Cap
- Hat side
Each placement may require different digitizing decisions.
Why Size Matters
A large back logo can accommodate more detail than a small chest logo. Small lettering and narrow lines become more difficult to reproduce as a design is reduced.
For this reason, brands should identify the intended size before the embroidery file is finalized.
Use Appropriate Stitch Types
Different parts of a clothing brand's logo may require different stitch structures.
Satin Stitches for Narrow Elements
Satin stitches are commonly used for lettering, borders, and narrow shapes. They can produce a smooth and clean appearance when properly digitized.
Fill Stitches for Large Areas
Fill stitches are useful for covering larger sections of a logo. The direction and spacing of these stitches should be planned according to the shape and fabric.
Running Stitches for Fine Details
Running stitches can be useful for thin lines and small design elements where broader stitching would not be appropriate.
Using stitch types according to the shape of each element can create a more balanced embroidered logo.
Control Stitch Density
Stitch density is one of the most important considerations in embroidery digitizing.
Too much density can create heavy stitching, while too little can leave fabric showing through areas that require coverage.
Problems With Excessive Density
Excessive stitches may contribute to:
- Fabric puckering
- Thread breaks
- Bulky embroidery
- Stiff garment areas
- Increased production time
Problems With Insufficient Density
Low density can result in:
- Weak coverage
- Uneven color
- Visible fabric
- Poor logo definition
The appropriate density depends on the design, fabric, stitch type, and size.
Pay Attention to Stitch Direction
Stitch direction influences both appearance and how the design interacts with the fabric.
A professional digitizer can change stitch angles between different sections of a logo to follow its shapes and create visual separation.
Proper stitch direction can help:
- Define curved shapes
- Improve texture
- Separate design elements
- Reduce visual flatness
- Support cleaner embroidery
For clothing brands, this can be particularly important when logos contain multiple shapes or large filled areas.
Use Suitable Underlay
Underlay stitches provide a foundation beneath the visible stitches.
They can help stabilize the fabric and support the top layer of embroidery.
Depending on the material and design, underlay can help with:
- Fabric stabilization
- Better stitch coverage
- Cleaner edges
- Reduced distortion
- Improved embroidery structure
The correct underlay should be selected based on the specific design and garment rather than applied identically to every logo.
Apply Pull Compensation Correctly
During embroidery, stitches can pull fabric and alter the appearance of certain shapes.
Pull compensation accounts for this behavior by making appropriate adjustments during digitizing.
This can be particularly important for:
- Small lettering
- Satin columns
- Rounded shapes
- Narrow borders
- Fine logo elements
Without appropriate compensation, some parts of a logo may appear narrower or differently shaped after stitching.
Plan the Stitch Sequence
Stitch sequence determines the order in which the different elements of a logo are embroidered.
A carefully planned sequence can help reduce unnecessary jumps and trims while keeping overlapping areas properly aligned.
Benefits of Proper Sequencing
A good sequence can support:
- Cleaner embroidery
- Better alignment
- Fewer unnecessary trims
- Efficient production
- Improved overlap between elements
The sequence should be planned around the structure of the artwork and the intended embroidery result.
Consider Different Clothing Fabrics
Clothing brands may use a wide range of materials.
Common examples include:
- Cotton
- Polyester
- Denim
- Fleece
- Twill
- Canvas
- Performance fabrics
- Blended materials
Each fabric can react differently to embroidery.
Stretch Fabrics
Stretchable garments may require additional consideration because the material can move during stitching.
Heavy Fabrics
Thicker materials can provide a more stable embroidery surface but may still require appropriate stitch planning.
Lightweight Fabrics
Thin fabrics can be more sensitive to excessive density and heavy stitch structures.
The digitizing approach should take the intended garment into account.
Optimize Logos for T-Shirts and Hoodies
T-shirts and hoodies are popular products for clothing brands, but they can require different embroidery considerations.
T-shirts may use lightweight or stretchy materials, while hoodies can include thicker fleece or layered construction.
The design should be tested on the intended garment or a similar material whenever possible.
This helps determine whether adjustments to density, underlay, or stitch structure are needed.
Prepare Embroidery Logos for Jackets
Jackets and outerwear often provide larger embroidery areas.
A brand may place a logo on the chest, sleeve, or back.
Larger embroidery allows more room for detail, but the design can also become heavier if too many stitches are used.
Proper planning helps balance visual coverage with garment comfort and production efficiency.
Optimize Logos for Caps
Caps require special attention because their embroidery surface is curved.
A logo intended for a flat garment may need modifications before being used on a cap.
Important considerations include:
- Design width
- Stitch direction
- Lettering
- Center alignment
- Curvature
- Stitch sequence
- Density
A cap-specific version of a logo can often provide a better result than simply resizing a flat-garment file.
Keep Brand Colors Consistent
Color consistency is important for clothing brands because logos are part of the brand's visual identity.
However, digital colors do not always have exact equivalents in embroidery thread.
The digitizer should select practical thread shades that represent the original logo as closely as possible.
When a logo uses several colors, the number and order of thread changes should also be considered.
Make Small Text Readable
Many clothing brand logos contain text.
Small lettering can become one of the most challenging parts of embroidery because individual characters need enough space to remain recognizable.
How to Improve Small Text
Depending on the design, a digitizer may:
- Adjust the lettering size
- Increase character spacing
- Simplify the font
- Modify stitch structure
- Reduce unnecessary details
- Test the lettering on fabric
The objective is to maintain readability after stitching rather than simply reproducing the original digital font.
Avoid Overcomplicating the Design
A digital logo may contain gradients, shadows, very thin lines, and other effects that do not translate directly into thread.
Embroidery works differently from screen-based graphics.
Some visual effects may need to be simplified using:
- Different stitch directions
- Thread color changes
- Layered stitching
- Appropriate density
- Texture variations
Simplification can help preserve the main visual identity while making the logo practical for embroidery.
Test Stitch Before Mass Production
A test stitch is especially valuable for clothing brands producing multiple garments.
The embroidery file may look correct in software, but the actual stitching process can reveal issues that are not visible on screen.
During testing, check for:
- Puckering
- Gaps
- Uneven coverage
- Distorted lettering
- Excessive thread buildup
- Incorrect colors
- Misalignment
- Thread breaks
If problems appear, the file can be adjusted before the brand begins larger production.
Common Digitizing Mistakes Clothing Brands Should Avoid
Several mistakes can negatively affect embroidered branding.
Using One File for Every Size
Different logo sizes may require different levels of optimization.
Ignoring Fabric Type
A file created for stable twill may not perform identically on stretchy knitwear.
Using Excessive Density
Too many stitches can make garments heavy and create unnecessary fabric distortion.
Ignoring Small Details
Tiny elements may disappear when embroidered at small sizes.
Skipping Testing
Without a test stitch, problems may only become apparent after multiple garments have been produced.
Choosing a Service Only by Price
The cheapest digitizing option may not provide the stitch quality or revisions needed for consistent brand production.
How to Choose a High Quality Embroidery Digitizing Service
Clothing brands should examine a digitizing service before sending important logo artwork.
Look for a service with experience creating:
- Clothing logos
- Small lettering
- Large back designs
- Cap embroidery
- Detailed artwork
- Designs for different fabrics
Reviewing actual embroidery samples can provide more useful information than looking only at digital previews.
Questions to Ask a Digitizer
Before placing an order, ask:
- Which embroidery formats do you provide?
- Can you digitize logos for different garment types?
- Do you consider the final embroidery size?
- Can you make revisions if needed?
- Can the design be optimized for caps?
- What information should I provide about the fabric?
These questions can help clarify whether the service understands your production requirements.
How Clothing Brands Can Prepare Artwork for Digitizing
Before submitting artwork, collect the information the digitizer will need.
Provide:
- Original logo
- Desired embroidery dimensions
- Garment type
- Fabric information
- Placement
- Thread color preferences
- Required machine format
- Special instructions
If the same logo will be used in several sizes or on different garments, mention this before the digitizing process begins.
High Quality Digitizing for Consistent Brand Production
Consistency becomes increasingly important when a clothing brand produces many garments.
A properly prepared embroidery system can help maintain similar logo appearance across different batches.
Brands should keep organized versions of their embroidery files and clearly label them according to:
- Design name
- Size
- Garment type
- Machine format
- Application
Maintaining separate optimized versions can make production easier and reduce the risk of using the wrong file.
Zdigitizing for Clothing Brand Embroidery
Zdigitizing is a trusted company providing embroidery and vector art services. Clothing brands can use professional digitizing to prepare logos and artwork for different embroidery applications while considering design size, stitch structure, fabric, and machine requirements.
For a clothing business, a logo is an important part of product presentation. Proper digitizing can help transform that artwork into embroidery that maintains its recognizable shapes and details while being suitable for production.
Conclusion
High quality embroidery digitizing is an essential part of creating professional clothing brand apparel. A successful embroidered logo requires more than converting a digital image into a machine file. Stitch type, density, direction, underlay, pull compensation, sequencing, fabric, size, and testing all contribute to the final result.
Clothing brands should provide clear artwork, communicate the intended garment and embroidery size, and work with a digitizing service that understands the physical requirements of machine embroidery. Testing the design before mass production can also help identify issues and reduce costly production problems.
With careful digitizing and proper preparation, brand logos can be transformed into clean, consistent embroidery suitable for T-shirts, hoodies, jackets, caps, uniforms, and other apparel products.
Frequently Asked Questions
1. Why is high quality embroidery digitizing important for clothing brands?
It helps convert a brand logo into a stitch structure that is suitable for embroidery. Proper digitizing can improve clarity, coverage, consistency, and the overall appearance of the finished garment.
2. Can one embroidery file be used for different clothing sizes?
It can sometimes be used for similar sizes, but significant size changes may require additional optimization. Small and large versions of a logo can have different stitch requirements.
3. Does fabric affect embroidery digitizing?
Yes. Fabric thickness, stretch, stability, and texture can affect how stitches behave. Digitizing may need to be adjusted according to the intended garment.
4. Should clothing brands test their embroidery logo before production?
Yes. A test stitch can identify problems such as puckering, gaps, distorted lettering, excessive density, or thread buildup before the design is used on multiple garments.
5. Can a detailed clothing brand logo be digitized for embroidery?
Most logos can be adapted for embroidery, but very small details, thin lines, and miniature text may need to be simplified or adjusted so they remain recognizable when stitched.
- Like
- Reply
-
Share




About Us · User Accounts and Benefits · Privacy Policy · Management Center · FAQs
© 2026 MolecularCloud